
Acoustic Panels

DIY Acoustic panels, can make a significant difference in the sound quality of a room by absorbing unwanted reverb.
When setting up a home studio, one of the biggest challenges is getting the acoustics right. Whether you’re a musician, podcaster, or voice actor, controlling the acoustics of your recording environment is crucial for achieving professional-quality sound recordings. If you have a dedicated room for your music production or content creation, you’ll know how much sound can bounce around and cause issues like reverb and echo. One solution is to use acoustic panels, which are specially designed to absorb sound and reduce reflections.
Acoustic panels are an essential component of any home studio setup. They absorb sound waves, reducing unwanted reverberation and echoes, and improving the overall clarity of recorded audio.
Sound Absorption vs Sound Proofing
Sound absorption and soundproofing are two different concepts, often used interchangeably but with distinct meanings.
Sound absorption refers to the process of reducing the amount of sound that is reflected off surfaces in a room: walls, ceilings, and floors. The goal of sound absorption is to improve the acoustics of a space by minimizing reverberation and echoes, which can make it difficult to hear speech or music clearly.
Soundproofing, on the other hand, is the process of reducing the amount of sound that is transmitted through walls, floors, and ceilings between rooms or from outside to inside a room. The goal of soundproofing is to prevent sound from leaking in or out of a space, making it more comfortable and private.
While both sound absorption and soundproofing are important for creating a high-quality listening environment, they require different materials and techniques.
Sound absorption typically requires porous, lightweight materials that can absorb sound waves, such as fiberglass, mineral wool, or foam and can be separate Acoustic Panels. Soundproofing, on the other hand, requires dense, heavy materials that can block sound waves, such as rubber or drywall with specialized soundproofing materials.
Sound Absorption
Acoustic panels are designed to absorb sound waves through a process called sound absorption. This process involves converting sound energy into heat energy, which is then dissipated in the panel. The effectiveness of a panel’s sound absorption depends on its physical characteristics, such as its thickness, density, and surface area.
When sound waves travel through the air and reach a surface, such as a wall or ceiling, they are partially absorbed, reflected, and transmitted. The amount of absorption, reflection, and transmission depends on the surface’s material, shape, and texture. Hard and smooth surfaces, such as concrete or glass, reflect sound waves, while soft and porous surfaces, such as acoustic panels, absorb sound waves.
Acoustic panels are typically made of materials with high sound-absorbing properties, such as fiberglass, rock wool, or foam. These materials have a porous structure that allows sound waves to enter and penetrate through the panel, where they are then trapped and absorbed by the material’s fibers or pores. This absorption process reduces the amount of sound energy that is reflected back into the room, thus reducing echoes, reverberation, and other acoustic problems.
In summary, acoustic panels absorb sound waves by trapping reflected sound waves in their porous structure, reducing the amount of sound energy that is reflected back into the room.
DIY Acoustic Panels vs Buying online
When it comes to soundproofing a room or creating an ideal acoustic environment for recording or listening, there are two options available: buying pre-made acoustic panels or making them yourself. Each method has its own advantages and disadvantages. Buying acoustic panels is certainly easier and more convenient, as they are designed and manufactured to a high standard. They typically come in a range of sizes and shapes, and with different levels of sound absorption properties, making them versatile and customizable. However, they can also be more expensive, and may not be feasible for those on a tight budget.
On the other hand, making your own acoustic panels can be more cost-effective and offer a greater degree of flexibility in terms of size, shape, and materials used. This can be particularly advantageous for those with specific needs or requirements. DIY Acoustic panels can also be a fun and rewarding project for those with an interest in DIY and woodworking. However, making acoustic panels from scratch requires some degree of skill and know-how, but if done right, the results may be as good as with commercially available panels, if not better.
How to Build a DIY Acoustic Panel
Usually, to build a DIY acoustic panel, you will need some basic materials like wooden frames, insulation material, fabric or burlap, and some basic tools like a saw, drill and optionally, a staple gun.
The idea for this project came about when the previous owner of my apartment left behind a double size mattress. Instead of spending a lot of money on expensive acoustic panels, I decided to use the mattress as the core material for an acoustic panel. it’s a cost-effective and easy way to improve the acoustics of a home studio without breaking the bank. Plus, it’s a great way to repurpose an old mattress and reduce waste. Also I gonna cover it with bed sheets and pillows in order to give it an interesting look.
Our mattress is a 160×180 cm double size mattress If you decide to use a different mattress or material, just change the measurements accordingly. Here’s what we gonna need:
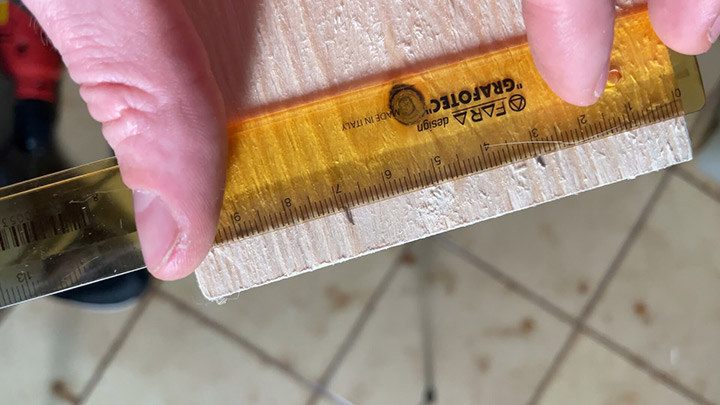
- 4 wooden planks (10cmx200cmx1.5cm)
- 4 small support planks (160cmx7.5cmx1.5cm)
- Bunch of screws (make sure they’re strong enough, 3 cm in length or more)
- Nails
- A drill
- A staple gun (optional)
- 4 screwable hooks
- 4 hooks for the ceiling
- 8 carabiners
- 5 m of chain (approx.)
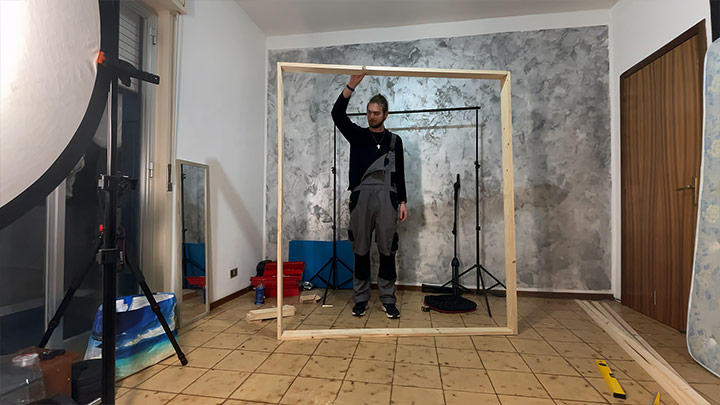
Cut the 4 wooden planks to size. Take two of the planks and cut them to a length of 180cm each. Cut the remaining two planks to a length of 160cm each. These will serve as the frame of the sound panel.
Place the 4 planks on a flat surface creating a rectangular frame. Ensure the corners are aligned properly.
Drill guiding holes into the wooden planks at the corners where they overlap. This will make it easier to screw them together. You need two of them per angle.
Using 7 cm screws, attach the corners of the frame by screwing them together through the guiding holes. This will secure the frame together, ensuring its stability.
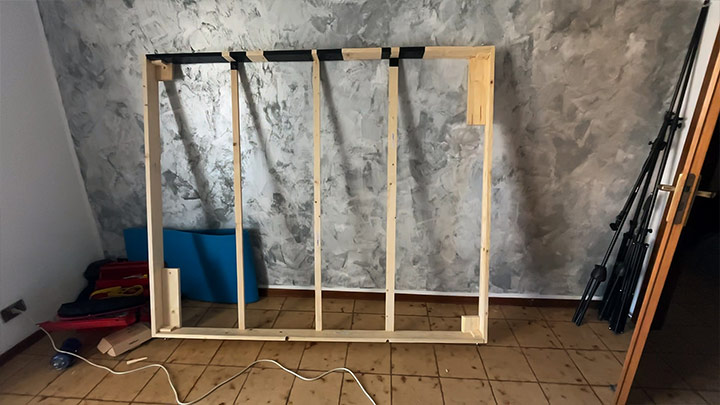
Place the small support planks inside the frame, evenly spaced along the longer sides. These support planks will help hold the mattress in place. Dry guiding holes and screw them securely into the frame. You can place as much supporting planks as you want but ensure it’s not too much or too little, otherwise it will block the sound from being absorbed or will not be able to support the weight of the mattress.
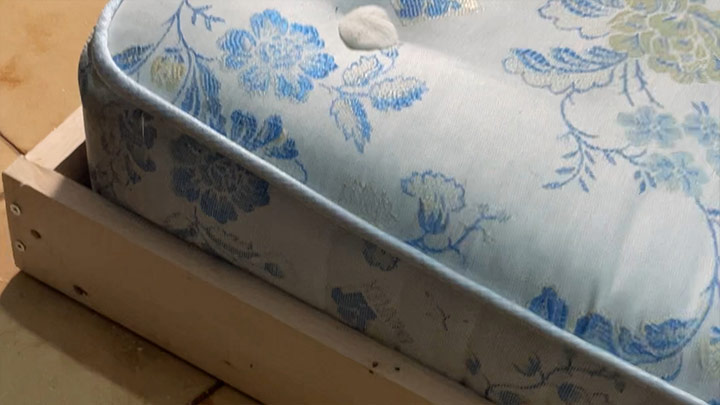
Lay the mattress on top of the frame, ensuring it fits within the boundaries of the frame.
Cover the frame with bed sheets. Pull the sheets taut and use a staple gun to attach them to the backside of the frame. If you don’t have a staple gun, just use nails. Make sure the sheets are stretched evenly to provide a clean and neat appearance.
Screw the four hooks onto the corners of the frame. These hooks will allow you to hang the sound panel.
Install four hooks on the ceiling, positioning them to align with the hooks on the frame.
Attach carabiners to each hook on the frame and on the ceiling.

Connect the frame to the ceiling using chain, linking the four corners of the frame to the hooks on the ceiling. Adjust the length of the chain as needed to ensure the sound panel hangs at the desired height.
Conclusion
In conclusion, creating a DIY acoustic panel can be a cost-effective and rewarding way to enhance the sound quality of your home studio or living space
Once the DIY acoustic panel is installed, the difference in sound quality can be remarkable.
Here’s a Before and After installing this DIY Acoustic Panel
BEFORE:
AFTER:
The panel absorbs and reduces unwanted reverberations, resulting in a more controlled and optimized environment. You can notice improved clarity, reduced echoes, and a more professional audio experience overall.
This DIY project is just one example of the many possibilities for improving your home studio or living space.
If you’re looking for something more lightweight you might want to read this article
If you’re interested in exploring more topics related to audio equipment, music production/synthesis, or cool experiments like this, be sure to check out our other articles on the blog. You’ll find a wealth of information and inspiration to further enhance your skills as a musician or a music producer.
